We all tend to take our feet for granted. Day in and day out they selflessly carry us on our appointed rounds. Seldom however do we take the time to reward feet for their service. Typically they only receive attention when already in pain. This is unfortunate as a few simple practices can often prevent the onset of problems. Moreover, preventative attention to the feet can deliver a host of benefits to the rest of the body enhancing both biological functions and a sense of well-being. It is this foot/body nexus which reflexology is designed to address.
In the following paragraphs I will cover a variety of exercises and stretches as well some basic techniques for self massage/reflexology. Please do not get hung -up too much on the specifics. It is more important that you try the techniques and persist in a basic maintenance routine. Trust your intuition. Over time you will discover what works best for you and become increasingly aware of what your feet are feeling and how integrated they are with your mind as well as the rest of your body.
1. Ice vs Heat
Often when our feet hurt, the initial reaction is to apply heat. This is fine if you are experiencing an aching sensation or a general sense of fatigue. For such conditions a warm soak in epsom salts (which help remove lactic acid from tired muscles) can work wonders. However, for acute pain resulting from injury or overuse, ice is the proper protocol. Such pain results from tissue damage and your primary objective should be to minimize inflammation through the application of ice. If the pain is located in the arch or soul of the foot, simply roll a frozen water bottle across the area. Elsewhere on the foot, a soft frozen pack works best. The key is to apply ice as soon as possible following activity or injury. Your feet are loaded with nerves and even slight inflammation can result in significant pain. Apply ice in 10 to 20 minute intervals as needed. If the pain begins to subside in 24 hours you may begin heat application; if acute pain persists, maintain icing.
2. Stretching
A few simple stretches can help you avoid fatigue and pain as well as more serious conditions such as plantar fasciitis.
A. Standing stretches
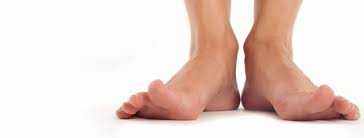
-top side of the foot
Holding onto a doorframe or tabletop for balance, place 1 foot slightly behind the other with the top side of the toes facing down in contact with the floor. Slowly bend your knee so that you create a slight stretch along the top of the ankle and foot. Hold for 3 to 5 seconds, relax, and repeat 5 to 10 times.
-underside of foot
Place the base of your toes (the balls of your feet) on an elevated surface (such as a step or a brick) and drop your heels to stretch the soles of your feet. Slowly bend at the waist to stretch the achilles tendons, the calves , hamstrings and glutes . Don’t force it; allow your bodyweight to slowly stretch the entire back of your legs as well as the underside of your feet. This stretch is highly effective at warding off a host of potential issues including lower-back pain and plantar fasciitis.
B. Seated stretches
-toe stretches
With 1 foot on the floor, cross the other leg over your knee. Slowly stretch the big toe backwards toward the shinbone and hold for five seconds. Now stretch it in the opposite direction towards the sole of the foot, again holding for five seconds. Next, rotate the toe in a clockwise motion three times, then counterclockwise three times. Try to increase the arc with each rotation. Reward yourself by slowly tugging the toe several times. Repeat the sequence for all toes on each foot.
-ankle rotations
In the same starting position, firmly grasp the heel of the target foot in one hand. Using the other hand grasp the toe area by placing the palm on top and wrapping the fingers underneath. Keeping the heel stable, slowly twist the forefoot in each direction. Hold for 3 to 5 seconds at the maximum point of stretch.
-dorsiflexion stretch
In the same starting position, place palm across top of foot and slowly push down, stretching the front of ankle.
3. Exercises
-One Legged Calf Raises
Standing on a step or block, slowly drop heel to maximum comfort level. Rise up on toes to maximum height and hold for 5 seconds. Repeat 10 times. Repeat on other foot.
-Towel Scrunches
Seating with feet on top of the edge of a towel, crunch toes repeatedly to pull towel towards you. As your dexterity increases add a weight (such as a heavy book) to increase resistance.
-One Legged Balance
Stand facing a table, with fingertips on top for balance. Bend one leg behind you at 90 degrees. Balance on the other foot for ten seconds (use your fingertips lightly for balance). Repeat with opposite foot. To increase difficulty try closing your eyes: you will be amazed how dramatically this makes balancing more difficult.
4. Reflexology/massage Procedures
(Start with no oils or lotions as the traction will allow you to press deeper without slippage.)
-Toes
Sit with left leg crossed over right knee, grasp top of foot with left hand to stabilize. Place right hand fingers on top of foot and thumb underneath. Using thumb from underneath and index finger on top, pinch the soft tissue between each toe. Repeat on opposite foot.
-Sole
In the same starting position, place opposite thumb at the base of the little toe. Press, hold briefly and move forward in tiny steps across the foot. Continue the same pattern, with each succeeding pass moving slightly closer towards the heel. When you reach the heel, press in a spiral clockwise fashion from the outside edge of the heel towards the center. Reverse direction moving towards the outer edge of the heel. Apply as much pressure as feels comfortable.
– Arch
Start at the base of the arch (towards the heel). Pressing with the tip of the thumb slowly work your way forward towards the base of the big toe. Make several parallel passes across the foot towards the outer edge.
Initially, these three basic movements will seem complex and confusing. Do not obsess over details; rather, focus on sensation. Your objective is to stimulate as many pressure points as possible. The duration and depth of pressure is entirely up to you. Over time you will discern the optimum pressure to use in each particular area. Every individual is unique; while anatomy charts are instructive, the structure and sensitivity of each foot is unique. Trust yourself. As you progress your thumbs and fingers will become increasingly stronger allowing you to apply pressure more deeply, for a longer duration, and thereby enhance sensation and benefits.
Experiment, focusing on sensation and effect. Reconnect with your feet and the feedback they provide. Next month part 2 will focus on massage techniques. Stay balanced!
 We all tend to take our feet for granted. Day in and day out they selflessly carry us on our appointed rounds. Seldom however do we take the time to reward feet for their service. Typically they only receive attention when already in pain. This is unfortunate as a few simple practices can often prevent the onset of problems. Moreover, preventative attention to the feet can deliver a host of benefits to the rest of the body enhancing both biological functions and a sense of well-being. It is this foot/body nexus which reflexology is designed to address.